Problem Statement
The overall aim of this exercise is to replace all components of ADFS servers with NetScaler appliances.
In this part of the exercise I will create an ADFS federation between two domains and test that a user belonging to the Identity provider (IDP, STA-A, Claim Provider) domain is able to successfully login in to a claims aware application hosted in the service provider(SP, STS-R, Resource domain, Relying party, ) domain.
Design Diagram

Building Blocks.
Domain Controller - Windows Server 2012
AD Configuration
There is no prerequisite on how the domain controllers should be configured.
We need a domain admin account to configure ADFS services on the ADFS servers. The configuration wizard creates a service account for ADFS services, so it is advisable to keep the names handy.
DNS Configuration
Since I would like to load balance my ADFS servers I have made the following static DNS entry on DNS servers.

Similarly a DNS entry was made on the VMW.LCL domain DNS
Adfs Host(A) 192.168.1.155 Static
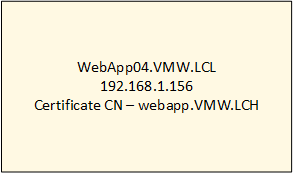
Webapp Host(A) 192.168.1.156 Static
Certificate Requirements
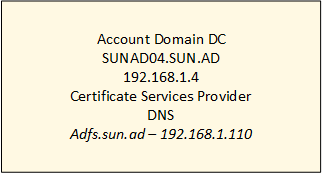
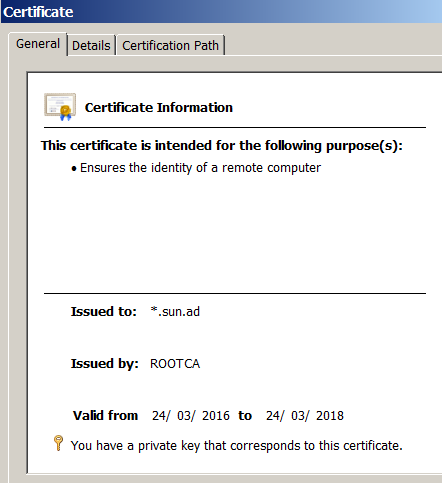
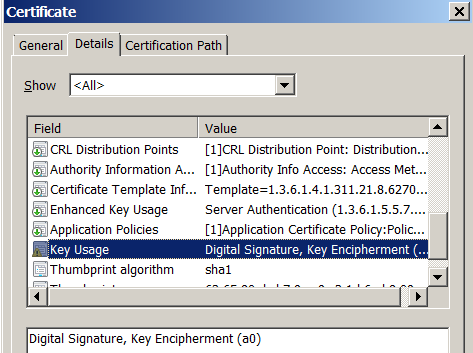
In our lab, this DC is also acting as Certificate Services provider - I have requested two wildcard certificates(Web Server Template with Exported private Key) from the CA.
In production environment, the certificates will be requested from within the IIS console and a separate certificate will be requested for two ADFS servers and the Web application server.

ADFS Servers
Configure ADFS services on adfs.sun.ad(IDP)

- Install the *.sun.ad certificate requested from our lab CA on a fresh Windows Server 2012 machine joned to the sun.ad domain.
- Make sure you import the certificate to the computer store and NOT the user store.
- Install the root CA certificate in the “Trusted Authorities” of your computer store.
- Use “Server Manager” to install the “Active Directory Federation Services” role on this server.
- Configure the federation service on this server - Create the first federation server in a federation server farm
- Make sure you select the SSL certificate we installed in step 1 above.
- This should exactly match the CN of the subject of certificate installed in step 1.
- In our case I will use the fqdn of the adfs load balancer - “adfs.sun.ad “ as the FS name.
- This is the DNS entry we talked about in the section above.
- It is advisable to use a new service account(sun\svcadfs) as
- This wizard will assign the required privileges as well as the required SPN.
- This user account is created under “Managed Service Accounts”.
- At least one of the domain controllers should be Windows 2012 otherwise wizard might not be able to create this service account.
- Open https://adfs.sun.ad/federationmetadata/2007-06/federationmetadata.xml. You should your ADFS servers Metadata.
Configure ADFS services on adfs.vmw.lcl(SP)

- Install the *.vmw.lcl certificate on this server.
- Install the CA certificate. In our example CA for both these certificates is same.
- Install “Active Directory Federation Services” role
- Configure the ADFS on this server - Create the first federation server in a federation server farm
- Select the correct SSL certificate.
- FS name in our lab is adfs.vmw.lcl.
- Service account vmw\svc_adfs
- Open https://adfs.vmwlcl/federationmetadata/2007-06/federationmetadata.xml . You should see your ADFS servers Metadata.
- I also checked the SPNs for the managed user account -

At this point of time I created a hosts file entry on adfs02.sun.ad
192.168.1.155 adfs.vmw.lcl
This entry will make sure that my IDP can fetch metadata from the SP.
Similarly another hosts file entry was made on adfs03.vmw.lcl
192.168.1.110 adfs.sun.ad
This ensured that my SP can fetch the metadata from the IDP.
Theoretically, the ADFS servers should not need to to talk to each other once the metadata has been fetched. I will test that theory once we have the solution working.
Claims aware web application server
The first thing we need for this lab setup is an application which accepts “claims” issued by an ADFS server. Such applications are called “Claims Aware Applications”.
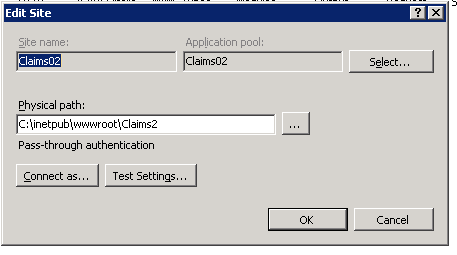
- So I downloaded the application and unzipped the contents to “C:\inetpub\wwwroot\Claims2” directory on my webapplication server.
- Installed the IIS Server on the server with the following features -
Web-Server,
Web-Common-Http,
Web-Default-Doc,
Web-Dir-Browsing,
Web-Http-Errors,
Web-Static-Content,
Web-Custom-Logging,
Web-Stat-Compression,
Web-Filtering,
Web-Windows-Auth,
Web-Net-Ext,
Web-Net-Ext45,
Web-Asp-Net,
Web-Asp-Net45
-IncludeManagementTools
Most of these features are selected by default, just make sure that ASP-Net and ASP-Net45 are installed.
Following windows feature might be required to install IIS -
Net-Framework-Core,
NET-FrameWork-45-Core,
Net-Framework-45-ASPNET
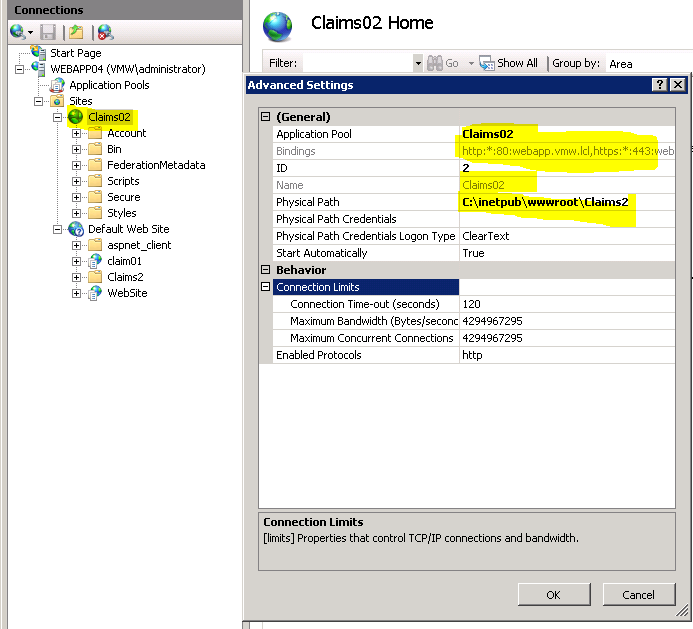
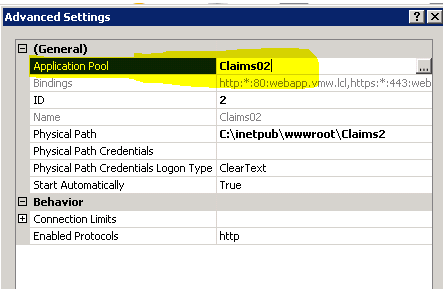
3> Added another website with the following settings
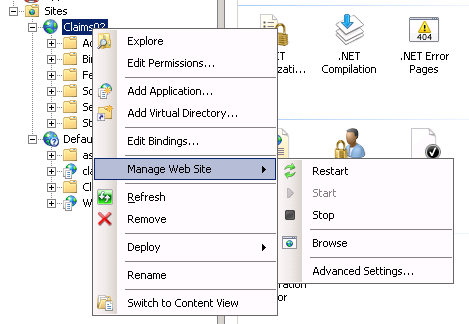
4> Shutdown the default website on this server and started the “Claims02” application.
5> Installed the webserver certificate and added https binding to the website.

6> Now we open the powershell script which comes with the application we downloaded in step 1 above.
7> First the scripts attempts to install the prerequisites -
Install-WindowsFeature Net-Framework-Core,NET-FrameWork-45-Core,Net-Framework-45-ASPNET #-Source $MediaPath
Install-WindowsFeature Windows-Identity-Foundation
Install-WindowsFeature Web-Server,Web-Common-Http,Web-Default-Doc,Web-Dir-Browsing,Web-Http-Errors,Web-Static-Content,Web-Custom-Logging,Web-Stat-Compression,Web-Filtering,Web-Windows-Auth,Web-Net-Ext,Web-Net-Ext45,Web-Asp-Net,Web-Asp-Net45 -IncludeManagementTools
So we need to install -
Net-Framework-Core,
NET-FrameWork-45-Core,
Net-Framework-45-ASPNET
Windows-Identity-Foundation
Some of these feature might need to be installed before the IIS installation.
8> Next, the script tries to get the thumbprint of the ADFS certificate -
$session = New-PSSession -ComputerName $ADFSServer
$Thumbprint = Invoke-Command -Session $session -ScriptBlock { (Get-ADFSCertificate -CertificateType:Token-Signing).Thumbprint }
So I run the commands on my webapp server -
PS C:\Users\administrator.VMW> $ADFSServer="adfs03.vmw.lcl"
PS C:\Users\administrator.VMW> $session = New-PSSession -ComputerName $ADFSServer
PS C:\Users\administrator.VMW> $Thumbprint = Invoke-Command -Session $session -ScriptBlock { (Get-ADFSCertificate -CertificateType:Token-Signing).Thumbprint }
PS C:\Users\administrator.VMW> echo $thumbprint
67BF3AE9230046AD61B6CAF0368C6187868BD635
Or I just open the certificate which I used in my Service Provider’s ADFS server configuration and note down the thumbprint -
$thumbprint = “67bf3ae9230046ad61b6caf0368c6187868bd635”

9> Next the script tries to find out the Metadata URI..
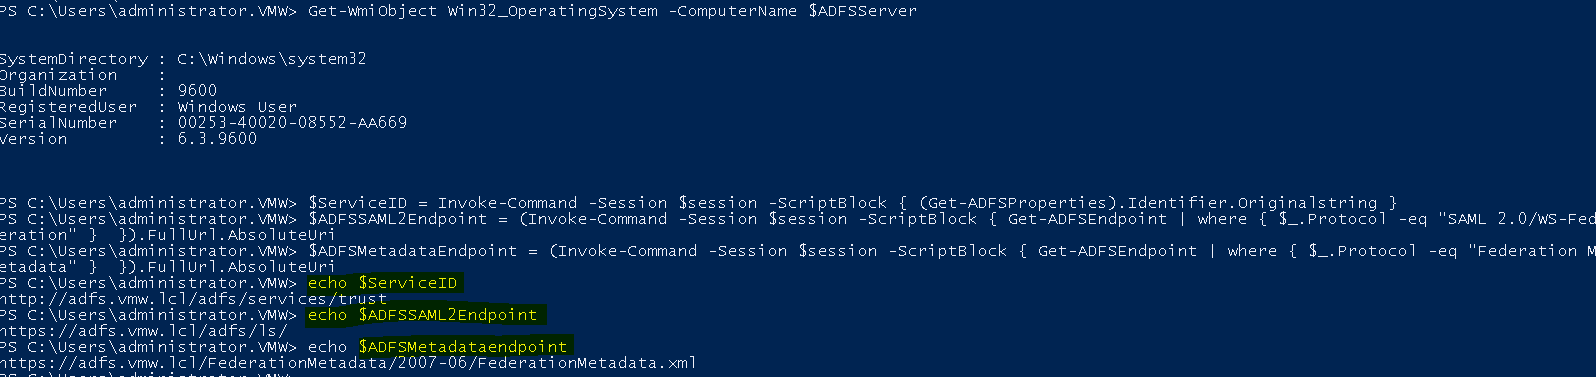
So in our setup -
$ServiceID = http://adfs.vmw.lcl/adfs/services/trust
$ADFSSAML2Endpoint = https://adfs.vmw.lcl/adfs/ls/
$ADFSMetadataendpoint = https://adfs.vmw.lcl/FederationMetadata/2007-06/FederationMetadata.xml
10> Next script tries to generate a self signed certificate, which we do not need to as we already have installed a certificate on our webserver.
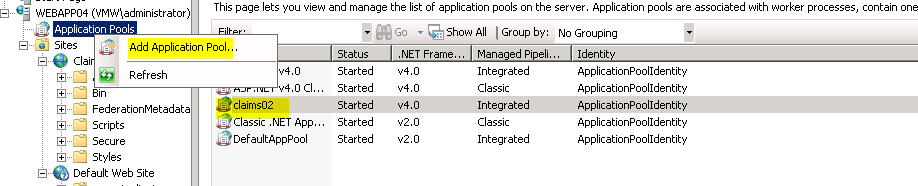
11> Next step is to create an app pool in IIS settings
$AppPool = New-WebAppPool -Name $SiteName
set-WebConfigurationproperty "/system.applicationHost/applicationPools/add[@name=`"$sitename`"]" -name "ProcessModel" -value (@{loadUserProfile="true"})
To accomplish the above -
Open IIS console on the web server -


12> Now the script tries to make changes to the web.config in the site physical path, which in our case is “C:\inetpub\wwwroot\Claims2”
Open web.config in notepad and..
Every occurance of “SAML2URI”
Every occurance of “APPLICATIONFQDN”
with “webapp.vmw.lcl”
Every occurance of “STSTHUMBPRINT”
with 67BF3AE9230046AD61B6CAF0368C6187868BD635
Every occurance of “SERVICEIDURI”
With http://adfs.vmw.lcl/adfs/services/trust
Every occurance of “FEDERATIONMETADATAURI“
with https://adfs.vmw.lcl/FederationMetadata/2007-06/FederationMetadata.xml
Now open “C:\inetpub\wwwroot\Claims2\FederationMetadata\2007-06\FederationMetadata.xml”
and replace both occurrences of APPLICATIONFQDN
with webapp.vmw.lcl
Restart IIS.
At this point our web application is configured to redirect all requests to the local adfs server, which will request authentication and then create “claims” and send to the application.
We now need to go back to our local ADFS server to configure it to -
1> Either request the local AD domain controller for authentication and create claims or
2> Request partner ADFS server for claims.
We will do both these configs one by one.
Configure the ADFS(vmw.lcl) server to create claims.
1> Open the ADFS management console on adfs.vmw.lcl.
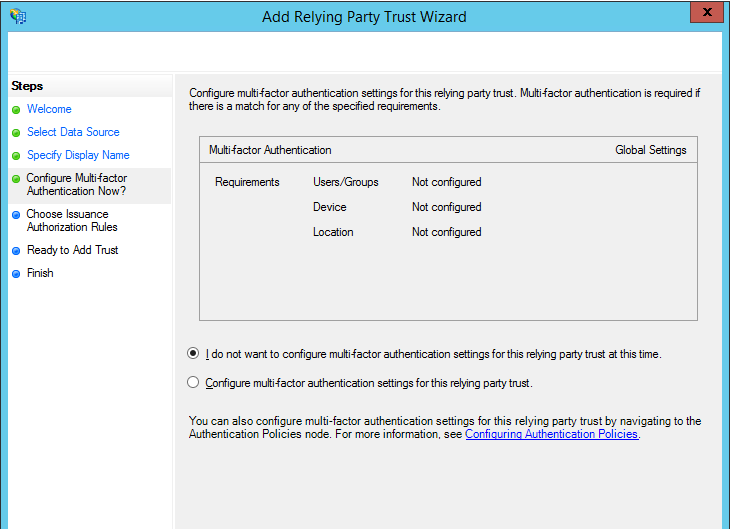
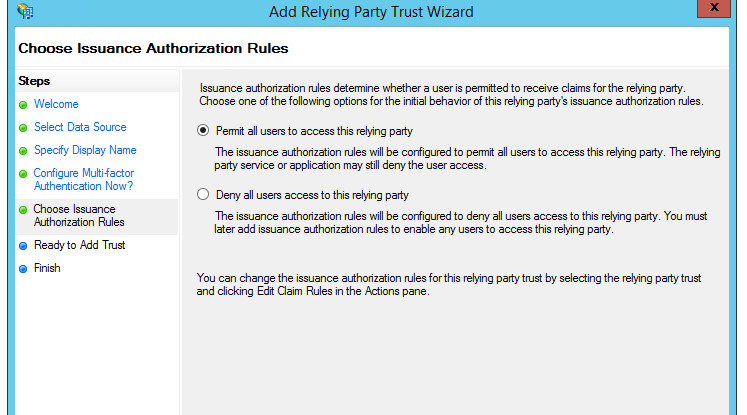
2> Add relying party trust

Leave next few pages default for this setup...


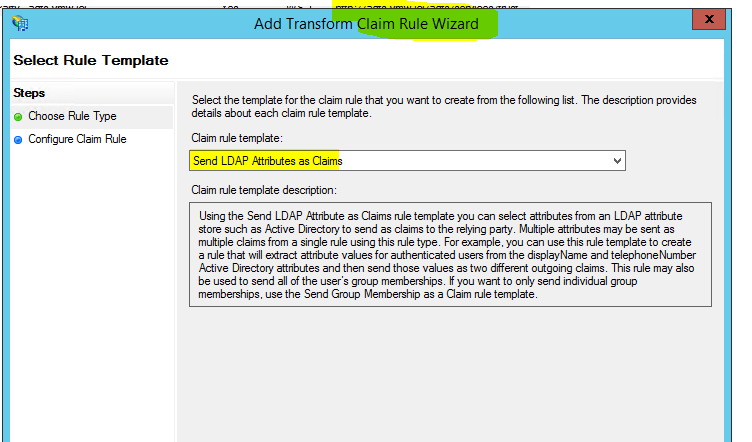
Adding Rules -
I have configured a number of rules. The Rules basically define what is passed on as a claim to the next party(for the lack of a better word). For this demo just one rule should be sufficient.

Testing - 1
At this point, if we try and access our webapplication from a client machine which can reach webapp server as well as the ADFS.vmw.lcl url. We should be able to login and see the claim received by the application!!

So we have a basic ADFS, single domain claims based authentication working. We will now add a partner ADFS server.
Now the next step is to
1> Configure the Server provider ADFS(vmw.lcl) to trust another claim provider.
2> Configure the Identity provider ADFS(Sun.ad) to trust a relying party.
3> Play around with rules and establish a flow of claims.
Configure the Service provider ADFS(vmw.lcl) to trust another claim provider.
Thing to notice here is that we are still working on the adfs03.vmw.lcl. We have done no configuration on the Identity provider ADFS(sun.ad) apart from the basic ADFS installation and configuration.
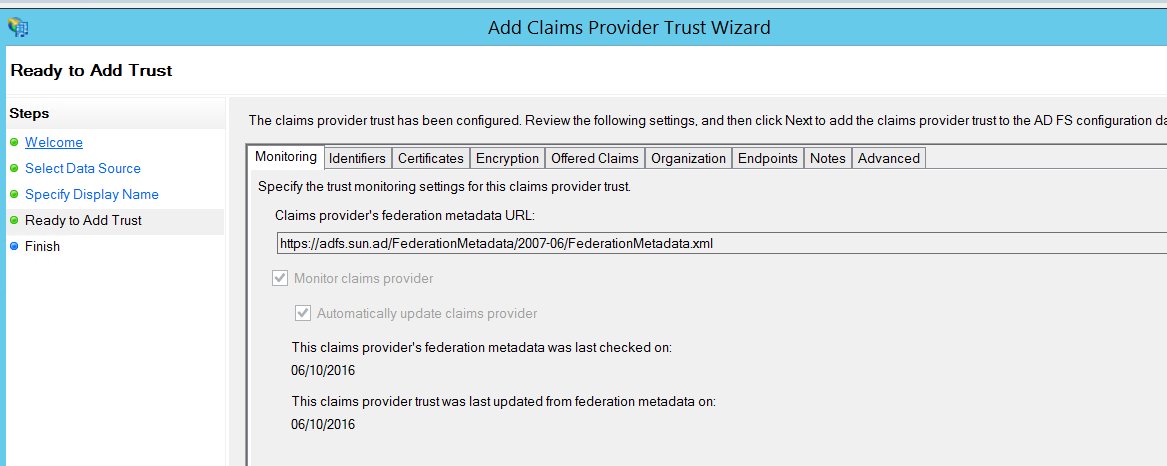
Add claims provider trust.
1> Open the ADFS console on adfs03.vmw.lcl and add claims provider trust. Lets “Start”
2> On the next screen there are multiple ways of entering the “Claims Provider’s” Metadata -
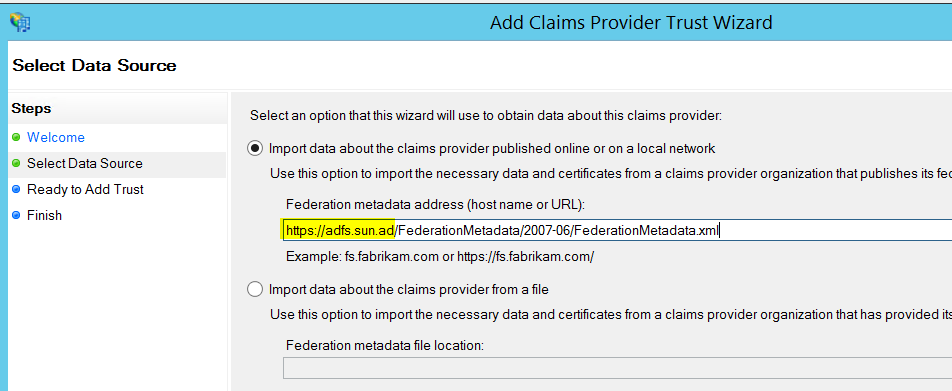

I choose all the defaults..
4> And then I add multiple rules.
5> As far as I understand, in these rules, we are defining the attributes which the this adfs server(the service provider) will pickup from the claim it receives from the identity provider.
These attributes will be forwarded to the application.
6> So to prove my point I make 5 different rules and see what happens..


So now my service provider will only process these five things it receives from the IDP’s claim.
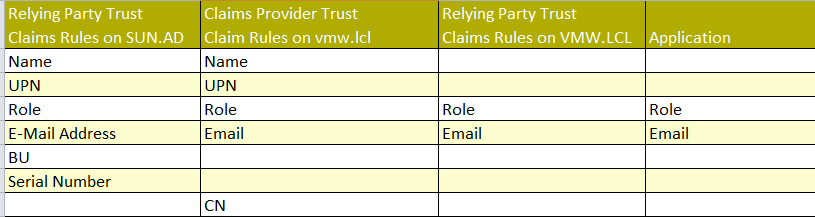
Edit the Relying Party Trust to include attributes in the claim.
At this point in time the claim which will be forwarded by the “Claims provider Trust” to the “Relying Party Trust” will include 5 attributes - Name, UPN, Role, Email and CN.
But the Relying party trust is not configured to forward any of these values to the application.
So we
1> Go to the “Relying Party Trusts” and edit the claim rules of the trust we created earlier.
2> I pick up only two of the attributes and select to be forwarded to the application.


Now we head to our Identity Provider Domain
Configuring the IDP ADFS(sun.ad) server
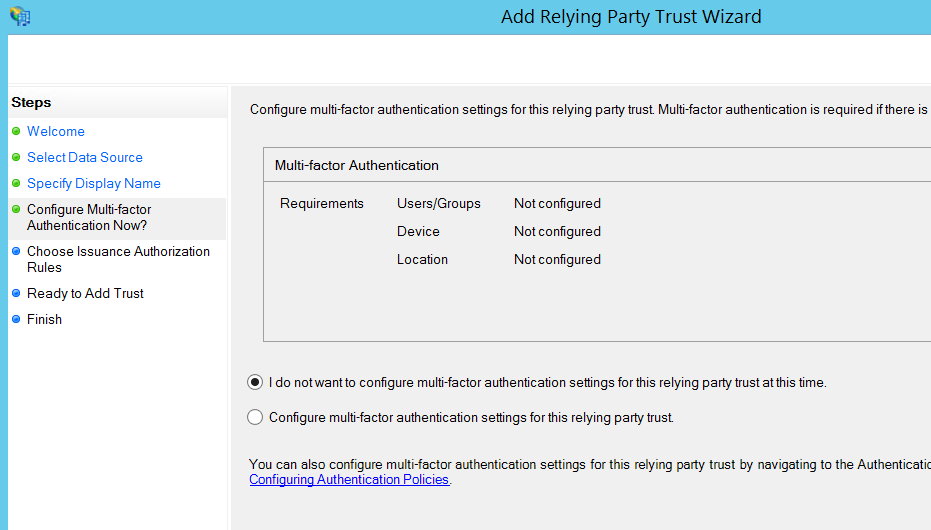
Adding the Relying Party Trust
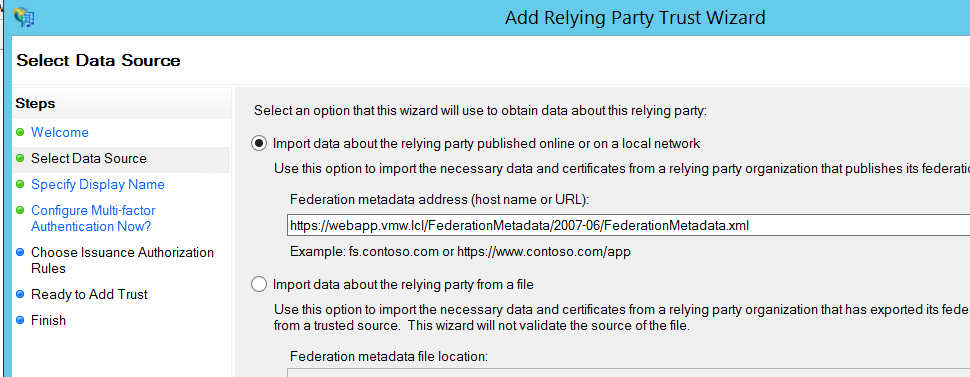
1> Open the ADFS console on the adfs02.sun.ad and add “Relying Party Trust”
2> Click start. Add the metadata url in the next window.


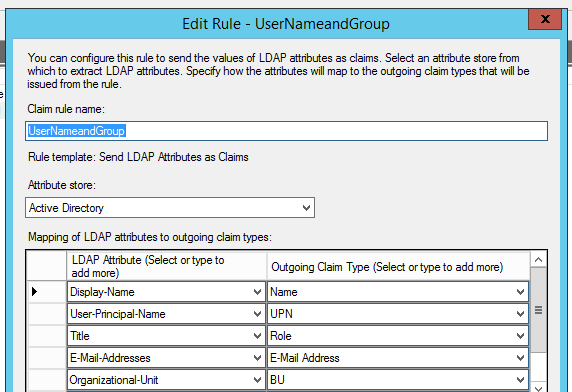
The following rule will define what this IDP picks up from the local (Active) directory, Bundles as a claim and forwards to the “Claims Provider trust” configured on the other ADFS.

Test - 2
1>Open a browser on a test desktop, NOT joined to vmw.lcl domain and type in the following in the address bar
2> As soon as you hit enter, the page should take you to .. adfs.vmw.lcl.
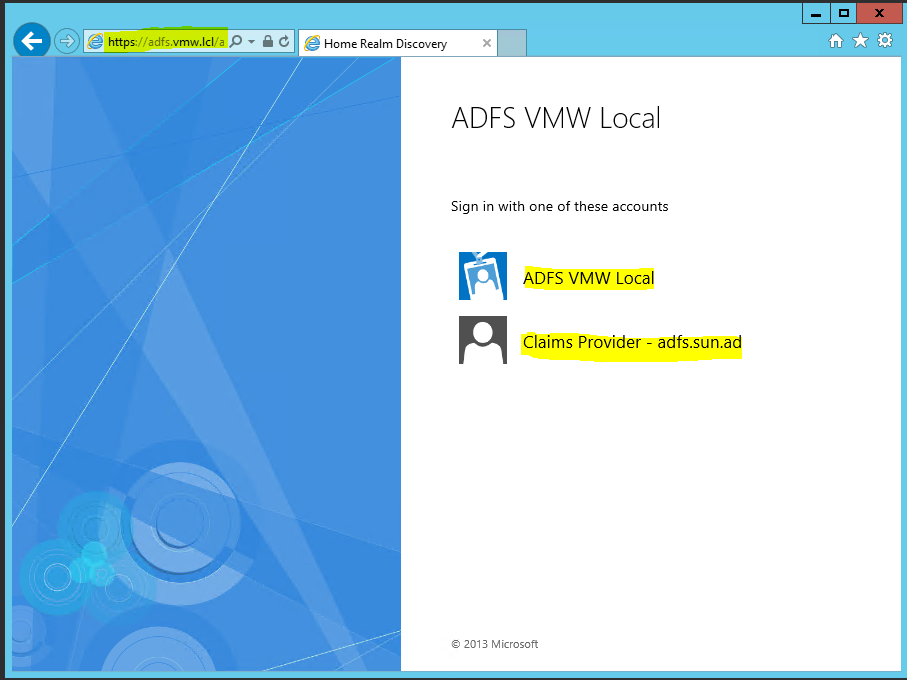
3> Click on “ADFS VMW LCL” is you have vmw.lcl credentials and click on “Claims Provider - adfs.sun.ad” if you have those credentials.

4> Here is the claim which reaches the application -

Here is the flow of the Claims attributes -